Let’s be honest: staring at that same, gloomy warehouse or the default map loop every time you launch the game gets boring fast. If you are like me, you want your gaming experience to feel unique from the moment you log in.The good news is that customizing the CS2 menu background is easier than you might think. Whether you want to put a highlight reel of your best frags, a funny meme video, or just a sleek, dark aesthetic to save your eyes from a blinding white background, Valve has left the door open for customization.
.jpg)
In this easy guide, I will walk you through exactly how to change CS2 main menu background, swap out the inspect background scenery in CS2, and even create your own loops. I’ve tested these methods myself on the latest patch, so you don't have to worry about breaking your game.
Article Contents:
Understanding the CS2 Menu Background
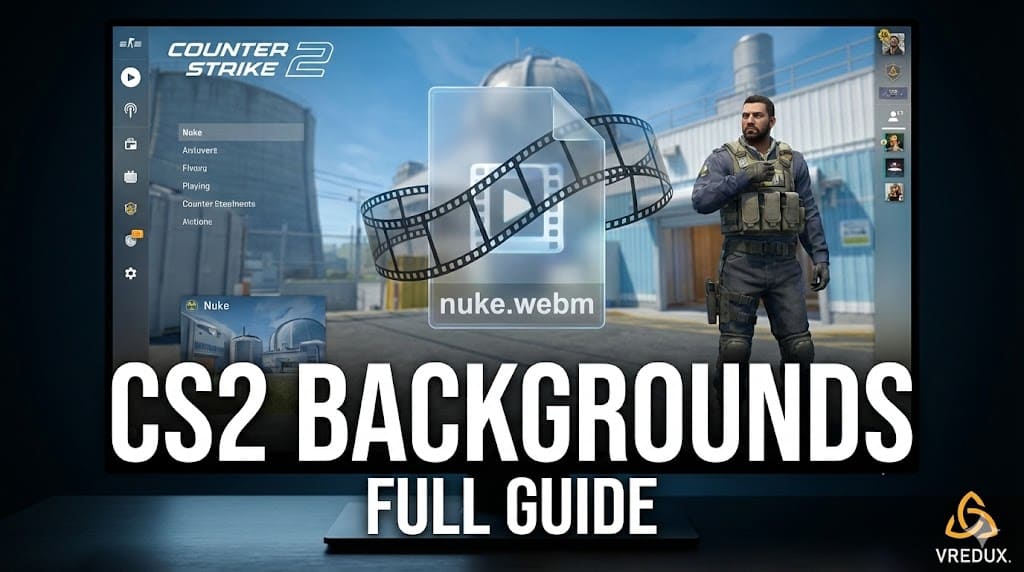
Before we start replacing files, it is important to understand how the Counter-Strike 2 interface works. Unlike the old static images in 1.6, the background in CS2 is actually a video file running in .webm format.
These video files are stored deep in your Steam folders. When you select "Nuke" or "Ancient" in your settings, the game simply pulls the corresponding video file from its directory. To customize the main menu, we essentially trick the game into playing our custom video instead of the default one.
This means you can theoretically put any video as your main menu background—from a world on youtube clip to a 4K render of your favorite anime—as long as it is formatted correctly.
.jpg)
Method 1: The Easy Way (In-Game Settings)
If you just want to switch between the official maps provided by Valve, you don't need to dig into files. This is the safest way to change menu background without leaving the game.
- Open Counter Strike 2.
- Click on the gear icon to open Settings.
- Go to the Video tab and then the Advanced Video sub-tab.
- Find the Main Menu Background Scenery option.
- Here you can select from the available maps (e.g., Anubis, Ancient, Nuke, Office, Vertigo).
- Check out our guide on how to show FPS in CS2 to monitor your new background's performance.
Pro Tip: If you want to save FPS in the menu and lower GPU load, choose a darker, less complex map or the "Inspect" background if available. However, this method only limits you to what Valve provides. To really personalize, we need to go deeper.
.jpg)
Method 2: How to Set a Custom Video Background
This is where the fun begins. To install a fully custom background—like a counterstrike2 highlight reel or a specific aesthetic loop—follow this step-by-step tutorial.
Step 1: Prepare Your Video
You need a video file. It can be anything, but for the best look, it should be 1080p or 1440p.
- Find a video you like (search for "CS2 background" on YouTube for loops).
- Convert that video to .webm format. There are many free online converters that do this.
- Name your file exactly one of the default map names, for example:
nuke.webm.
Step 2: Locate the CS2 Video Folder
You need to find where Counter-Strike keeps its menu videos.
- Open Steam, right-click on Counter-Strike 2, go to Manage -> Browse local files.
- Navigate to this path:
game\csgo\panorama\videos. - In this folder, you will see files like nuke.webm, ancient.webm, vertigo.webm.
Step 3: Replace the File
-
Important: Rename the original nuke.webm to something like nuke_backup.webm. Do not delete it, in case you want to revert to the default background.
-
Drag and drop your new custom nuke.webm into this folder.
-
Launch the game.
-
Go to Settings -> Video and set Main Menu Background Scenery to "Nuke".
Boom! Your main menu should now be playing your custom video. I personally use a dark neon city loop—it looks cleaner and makes the interface text pop.
.jpg)
How to Change Item Inspect Background Scenery
Many players ask me how to change item inspect background. When you inspect a skin or weapon, the game loads a specific lighting environment (scenery).
To change CS2 main menu background for the inspect screen, the process is similar but uses different files.
- The inspect background files are usually named
ui_inspect_...inside the maps or panorama folders. - Valve has made this a bit trickier in recent updates compared to the main menu, as these often rely on 3D map lighting rather than just a video.
However, you can change the "Inspect" map via the console to see how your skins look in different lighting:
- Enable the developer console (~).
- Type
map_background_preview [map_name].
This allows you to see your inventory against different background scenery.
Default vs. Custom Backgrounds
Is it worth the hassle to change the background? Here is my breakdown:
| Feature | Default Background | Custom Background |
|---|---|---|
| Visual Style | Generic, repetitive | Unique, matches your vibe |
| Performance | Optimized by Valve | Depends on video size/quality |
| Installation | Instant (In-game menu) | Requires file replacement |
| Updates | Always works | Might reset after game updates |
| Cool Factor | Low | High |
Troubleshooting: Black Screen and Audio Issues
Sometimes things go wrong when you try to customize CS2. Here are common fixes I’ve found.
Problem: The background is black.
- Fix: Ensure your video is in .webm format and not .mp4. Also, check if you named it exactly like the original file (e.g., nuke.webm).
Problem: The video plays but it's laggy.
- Fix: Your video file size might be too huge. Try compressing it or lowering the bitrate. A 2 menu background file shouldn't be 500MB.
Problem: No audio or too much audio.
- Fix: CS2 usually plays menu music over the video. If your custom video has sound, it might clash. I recommend stripping the audio from your .webm file before using it.
.jpg)
Enhancing Your Game Beyond Visuals
Changing the background scenery in CS2 gives you a fresh look, but it won’t help you hit headshots. While you are tweaking your pc files to make the game look good, you should also think about performance.
Personally, I use the private cheat VRedux. It’s not just about winning; VRedux offers optimization tools that can actually improve your FPS, which is critical if you are running high-quality animated backgrounds. Plus, with the Skin Changer feature in VRedux, you can inspect any expensive skin in the game against your new custom background without spending a dime.
FAQ
Will I get VAC banned for changing the background?
No. Replacing .webm video files for the menu background is purely client-side and does not interfere with game files PAK01_DIR.VPK or core mechanics. It is safe.
Can I use a transparent background?
Counter-Strike 2 doesn't natively support a fully transparent background for the main menu because there needs to be something behind the UI. However, you can use a solid color (like a green screen) if you are a content creator.
How do I reset to the default?
Simply delete your custom file and rename your backup file (e.g., nuke_backup.webm) back to nuke.webm. Or, verify integrity of game files in Steam.
Where can I download cool backgrounds?
Search YouTube for "CS2 background loop" or check the steam community guides. There are tons of creators making amazing counterstrike loops.
Does this work for the 2 menu (CS2) update?
Yes, this guide is specifically for Counter-Strike 2. The methods from CSGO (Global Offensive) are slightly different.
Conclusion
Customizing your CS2 menu is a small detail that makes a big difference in how the game feels. Whether you want to enhance the visuals with a 4K loop or just change your background to a solid color for better text readability, the power is in your hands.
It allows you to personalize your setup and stand out. Just remember, after every major Counter-Strike 2 update, verify your files haven't been overwritten.
Now that your game looks professional, it’s time to play like a professional. If you want to boost your rank and unlock the true potential of your account, I recommend trying VRedux. It is the ultimate tool to dominate the server while enjoying your fresh new graphic interface.